Think of an artist’s tools. Do you picture paint and a canvas or a chisel and stone? Then you might be surprised to learn about crystal art photomicrography, the unexpected art of imaging crystals with a microscope. The craft highlights the beautiful colors, textures, and patterns of crystals viewed through the microscope lens.
Just consider the image above. At first glance, it may look like an abstract painting. However, it actually shows the crystal of a topical medicine for wart treatment, also known as callus remover. You can see the pretty pattern that evolved during the crystallization process of the substance on the microscope slide.
I’m happy to say that this image, which I captured using a microscope modified for polarization, won in the materials science and engineering category for the Evident Global Image of the Year 2022 Award! You can read more about the award-winning image here. If you’re curious how to obtain similar images, then read on for tips on getting started with crystal art photomicrography.

Shyam Rathod holding the materials science award for the Evident Image of the Year 2022 contest.
Shedding Polarized Light on the Hidden World of Crystals
Crystal art photomicrography involves using a polarizing microscope along with innovative techniques to make a thin layer of crystals to place on a microscope slide. The best region on the microscope slide is imaged, which may be around 1×1 mm in size or less depending on the magnification of the objective lens.
Timing is also important, as you must click the camera at the exact moment when the beautiful pattern emerges during crystallization. The shapes, textures, and pattern are different each time the crystal forms, so you won’t get the exact image again. This makes all the images uniquely beautiful.
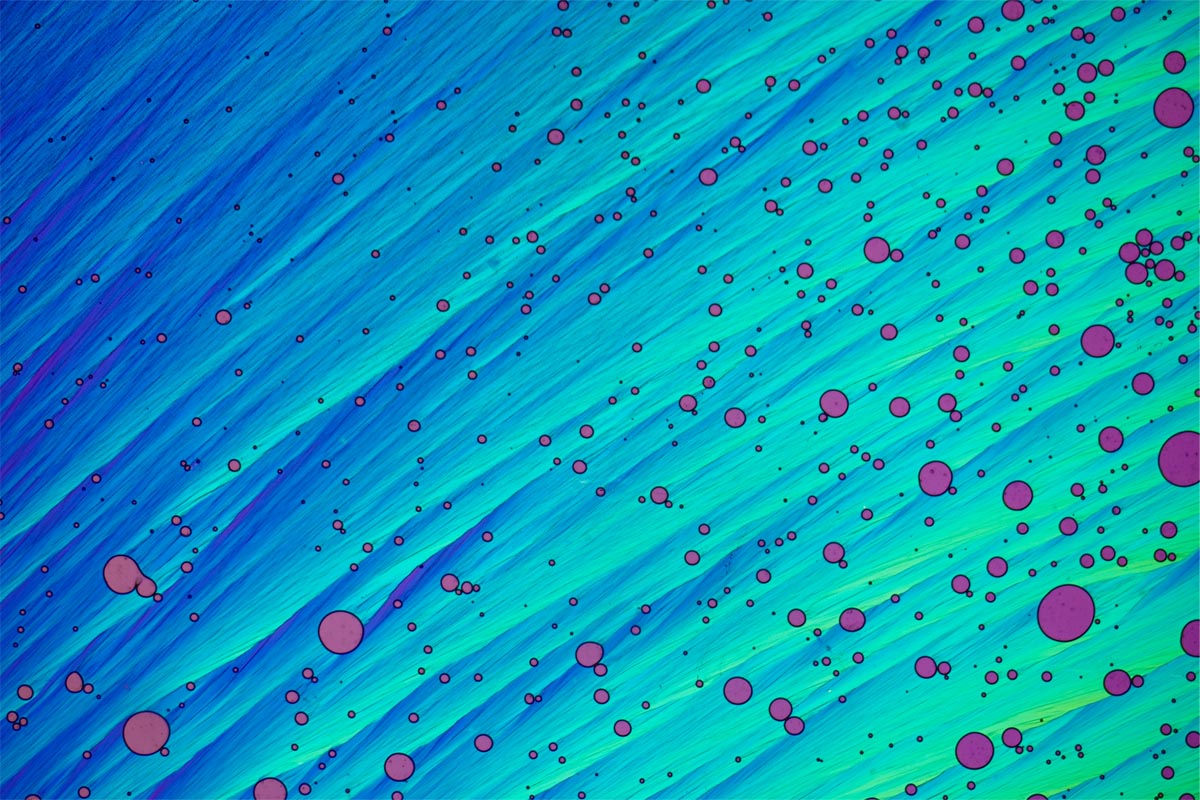
Are we looking into the ocean? This image is actually melted erythritol, an artificial sweetener. In the melting process, bubbles of air become trapped in the crystal and solidify inside like a cavity. Image courtesy of Shyam Rathod.
6 Reasons to Observe Crystals with Polarized Light
One of the key pieces of equipment to take beautiful and colorful images of crystals is a polarizing microscope, so let’s get into the science and art behind it. A polarizing microscope is an essential tool to observe crystals for several key reasons:
1. Birefringence detection
Many crystals exhibit birefringence, a phenomenon where a crystal splits light into two rays traveling at different speeds, resulting in two images. A polarized light microscope, with its polarizing filters, is designed to detect and analyze this property.
2. Enhanced contrast
Polarized light enhances the contrast between the crystal and its background, making it easier to observe the details and structures within the crystal. This is particularly useful for transparent or translucent crystals.
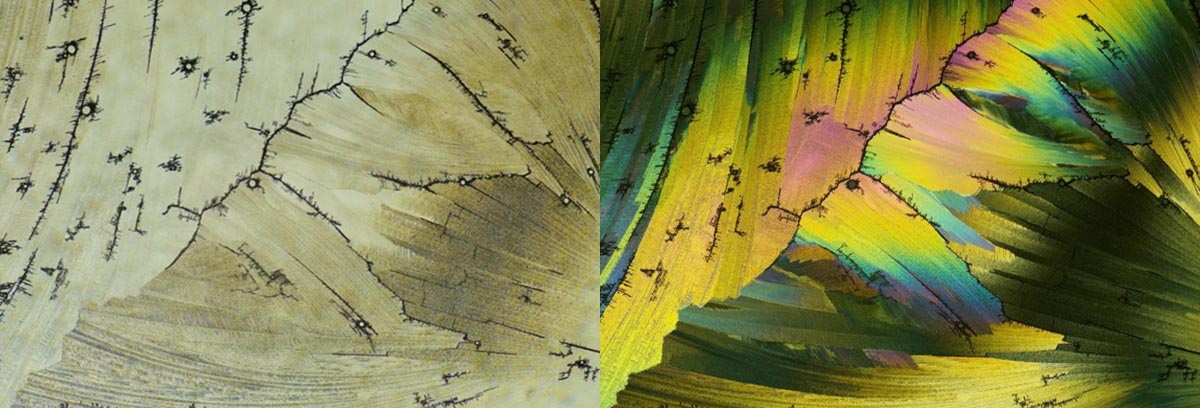
Images of microcrystals under normal light (left) and polarized light (right). Images courtesy of Shyam Rathod.
3. Analysis of optical properties
Using polarized light allows for the detailed study of a crystal's optical properties, including its refractive index and optical orientation. This information can be crucial for identifying and characterizing different types of crystals.
4. Stress analysis
In materials science, polarized light microscopy helps in observing stress patterns within crystals. This is particularly important in fields like mineralogy and materials engineering, where understanding the internal stress of a material is essential.
5. Observation of interference colors
Under polarized light, some crystals display unique colors due to interference effects. This phenomenon can be used to identify certain minerals and to understand more about the crystal structure.
6. Mineral identification
In geology and mineralogy, polarized light microscopy is a standard tool for identifying minerals. Many minerals have distinct optical properties under polarized light, aiding in their identification.
As highlighted above, a polarizing microscope is an invaluable tool in the study of crystals, offering enhanced visibility, detailed analysis of optical properties, and unique insights into the internal structure and stress patterns of crystalline materials.
All these benefits make it an incredible tool for crystal art photomicrography. If you don’t have a polarizing microscope on hand, you can take a do-it-yourself approach to set up an imaging system, as detailed below.
Equipment Needed to Capture Colorful Images of Microcrystal
The recommended system setup includes:
1. Polarizing microscope
While a dedicated polarizing microscope would work, I converted a trinocular microscope into a polarizing microscope. To do so, I inserted two polarization filters, cut to size, in the optical path: one under the head and the other under the condenser.
I also sometimes use a low-budget cellophane plastic (retarder) to bring out the colors. Rotating the retarder offers different colors in the pattern. You can make a retarder by using a sheet of plastic, thin like a CD cover, or by experimenting with different plastics. Some people use a mica sheet, but inexpensive plastic works really well.
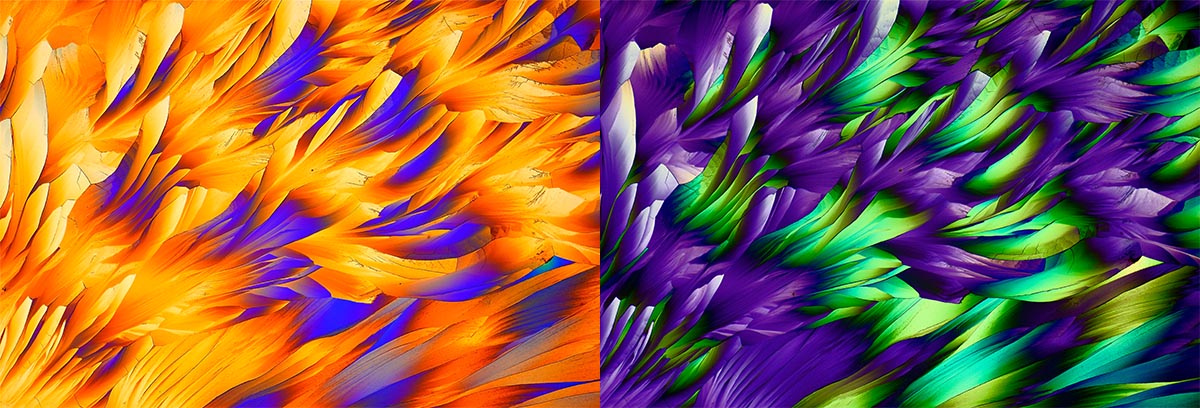
Beta-alanine and L-glutamine dissolved in vodka. The images show the same slide with the retarder rotated at a different angle, bringing out different colors in the pattern. Images courtesy of Shyam Rathod.
2. Imaging system
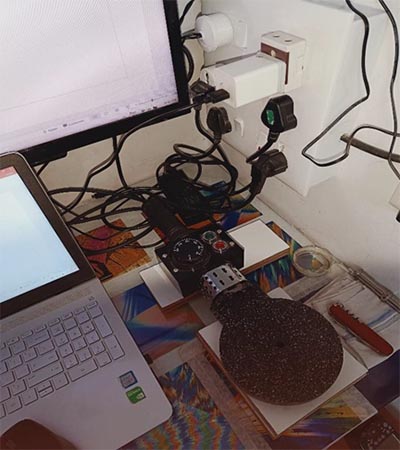
The digital microscope camera is connected to a laptop via a USB cable controlled by software. I use a desktop imaging application for viewing, editing, and controlling the camera. A mechanical coupler connects the camera to the microscope head. For my setup, I designed and fabricated a DIY coupler with a 3D printer. A source of primary light is required, such as the built-in light source of a microscope, preferably LED white light, or a DIY flash.
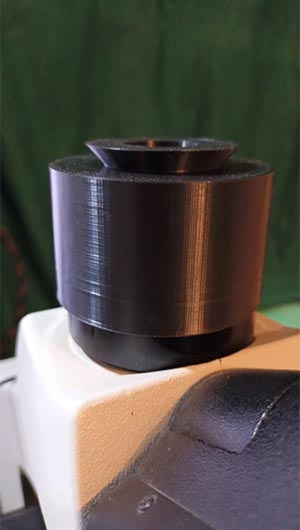
3D printed coupler to connect the camera to the microscope head. Image courtesy of Shyam Rathod.
3. Pure chemicals
You can obtain a microcrystal using a chemical (or the combination of various chemicals) in two ways: by dissolving the chemical in a solution or by melting the powder of the chemical on a temperature-controlled heater.
Here's a quick overview of the two methods:
- Directly melt the pure chemicals by heating and then cooling. For reference, see the melt method by Peter Juzak from Germany. Some chemicals I use for melting crystals are urea, paracetamol, sulfur, ammonium acetate, caffeine, menthol, and inositol.
- Dissolve chemicals in water or alcohol. For reference, see the dissolve, heat, and cool method by Loes Modderman from the Netherlands. Most chemicals dissolve in tap water, so the list of chemicals you can use is full of possibilities. You could also try vodka or ethanol as a solvent instead of water.
Combining different chemicals or adjusting the ratio of chemicals will create different patterns, so get creative! Along with chemicals, you’ll need some microscope slides and coverslips to hold the substances during the imaging process. You can use the coverslips to flatten the crystals and create new patterns.
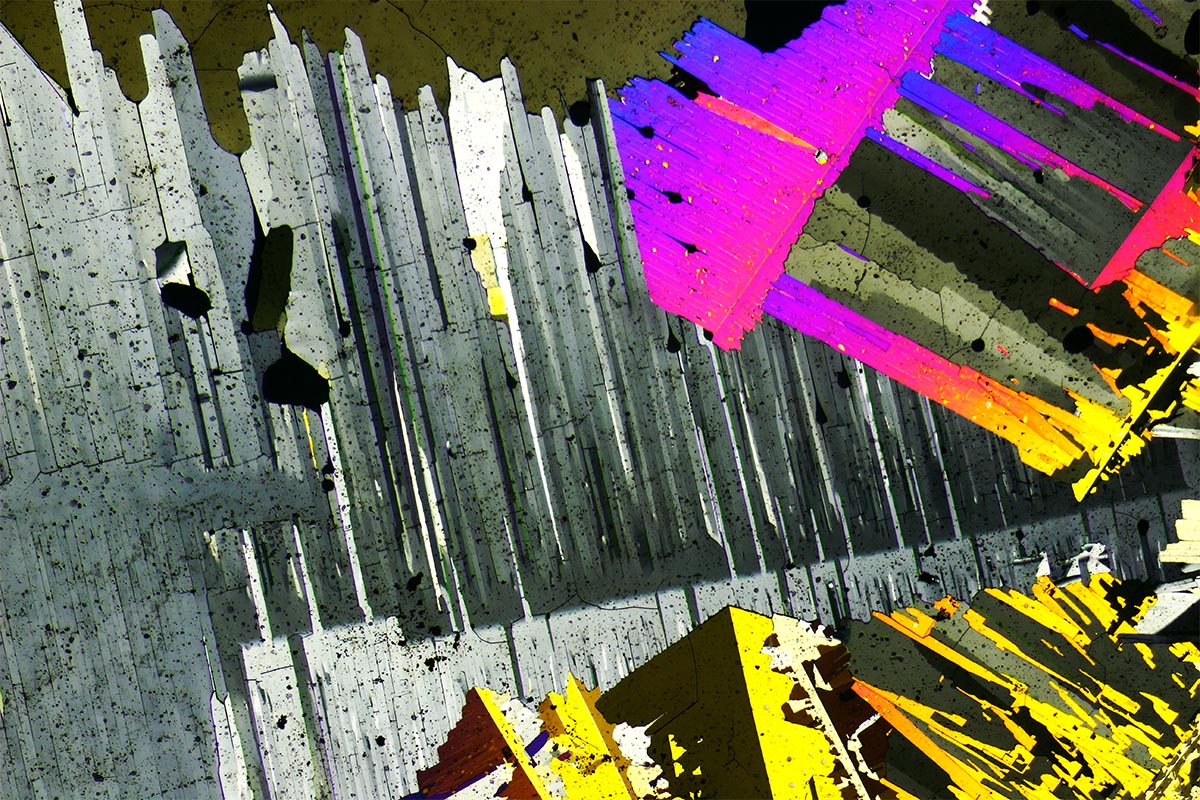
This isn’t a splatter art painting! The image shows melted sulfur captured under the microscope. Each time you melt the substance and press the coverslip, the thickness of crystals under the slide shrinks and more beautiful patterns and colors appear. Image courtesy of Shyam Rathod.
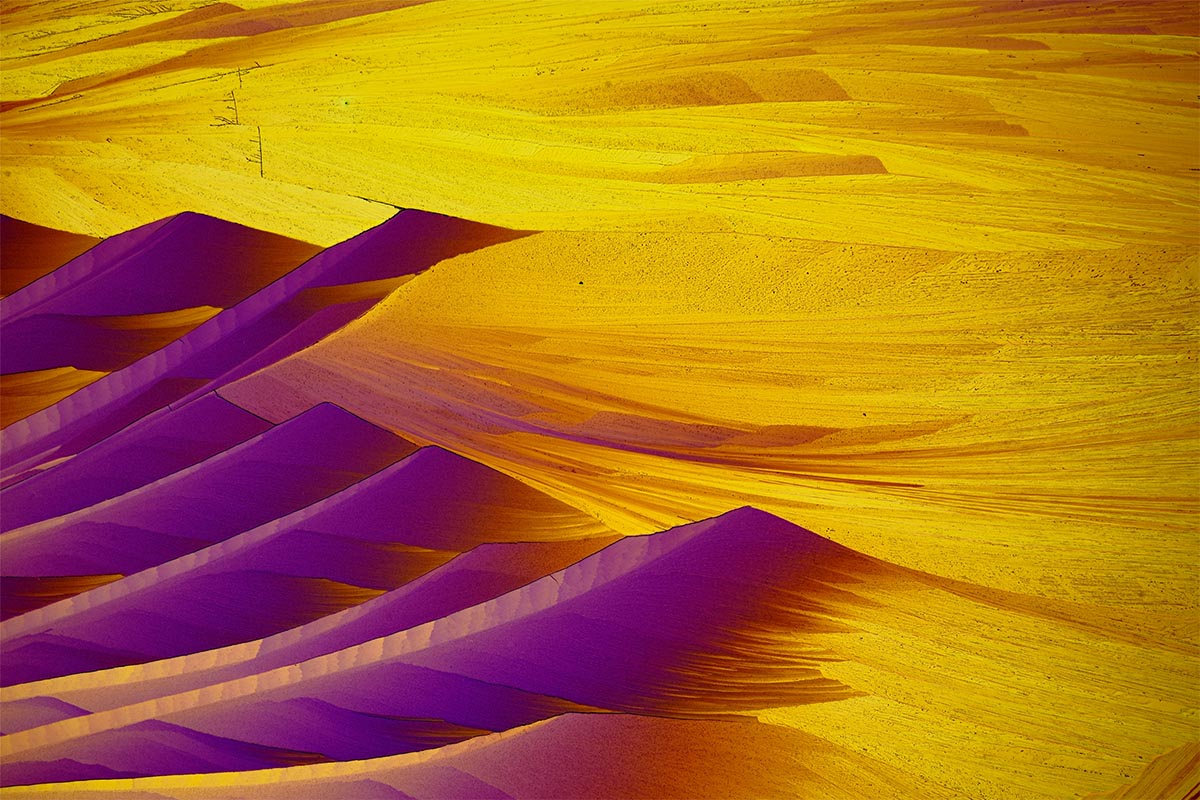
While this may look like a painting of dunes in the desert, it’s actually the microcrystal of beta-alanine and L-glutamine (BA-LG) dissolved in vodka. Image courtesy of Shyam Rathod.
4. Heater with temperature control
Heating slides with a chemical at a desired temperature is essential to avoid overheating or causing the chemicals to boil, evaporate, or burn. Also, various chemicals melt at different temperatures. I have a heater that offers a temperature range of 50 °C to 300 °C or 122 °F to 572 °F.
Temperature-controlled heater for melting chemicals used in crystal art photomicrography. Image courtesy of Shyam Rathod.
Additional Advice to Create Microscope Art with Crystals
I always think the best way to other worlds is through smaller rather than bigger chemistry. If you want an adventure that brings you into the art hidden in the microworld, then give crystal art photomicrography a try! For more guidance, join the Crystal Art Photomicrography group on Facebook created by Loes Modderman, where you can learn from fellow microscopists about this rare art. Maybe you’ll
find inspiration there to create your own artwork.
Related Content
Art of Chemistry: Meet the First IOTY Materials Science Award Winner
Image of the Year 2022 APAC Winner Captures the Colorful Microscopic World
Small Masterpieces of Nature—Meet the Image of the Year 2022 EMEA Winner