5 Basic Microscope Adjustments for ART Research
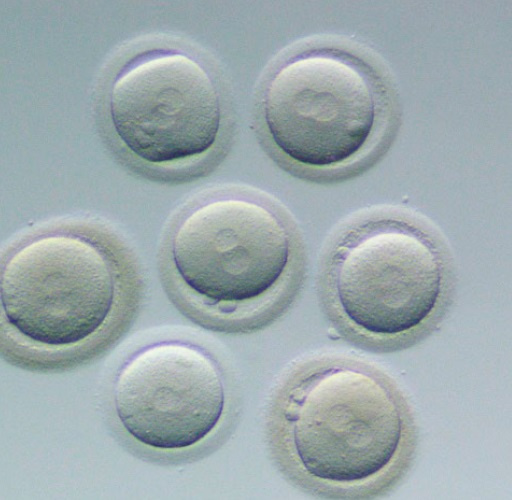
Fertilized Embryo |
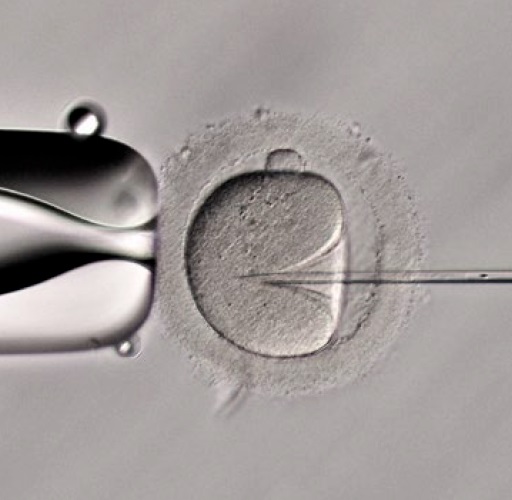
ICSI (Relief contrast) |
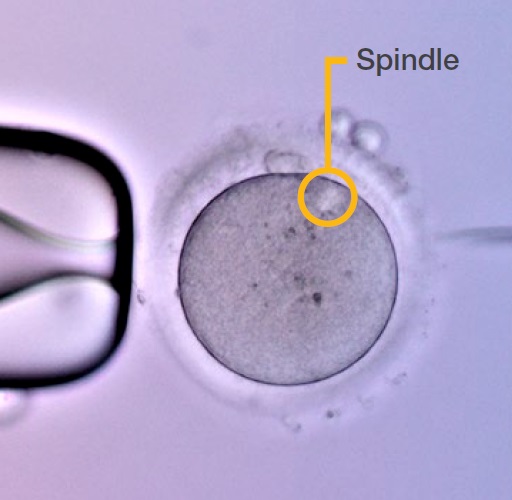
Spindle (Polarizing observation) |
|

Assisted reproductive technology (ART) refers to procedures and treatments used to address infertility.Olympus offers different types of microscopes to support a range of research applications in assisted reproductive technology, such as:
- Stereo microscopes for oocyte cleaning, oocyte freezing, and embryo thawing observation
- Upright microscopes for sperm observation
- Inverted microscopes that support the workflow of intracytoplasmic sperm injection (ICSI) and intracytoplasmic morphologically selected sperm injection (IMSI) and spindle observation
Properly adjusting your microscope for these tasks can improve the quality of the observed images. To support your work, this application note will share five basic microscope adjustments to help optimize your daily observations and workflow. Note that the procedures below focus on commonly used Olympus inverted microscopes and stereo microscopes.
1. Optical Axis Adjustment
To adjust the optical axis on an IX73 or IX83 inverted microscope, follow these steps:
- Move the aperture iris diaphragm lever of the condenser to the leftmost position to open the diaphragm.
- Move the field iris diaphragm lever of the illumination pillar to the leftmost position to open the diaphragm.
- Focus on the specimen using a 10X objective lens.
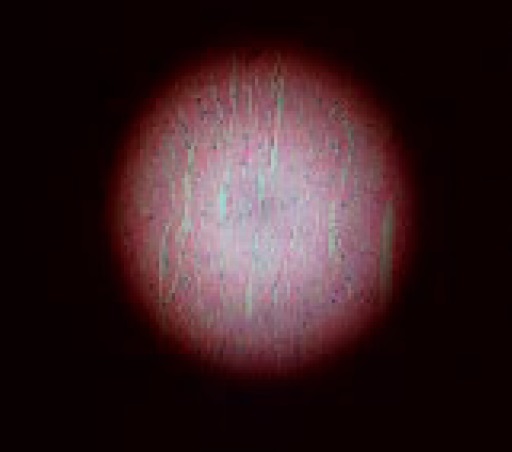
- Move the field iris diaphragm lever slightly to the right to stop down the field iris diaphragm so that its image is in the field of view. (Figure 2a shows the view through the eyepiece.)
- Rotate the condenser handle that moves up and down to focus on the image of the field iris diaphragm.
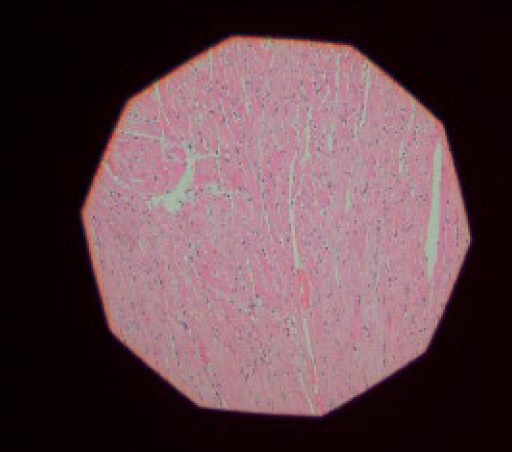
Make sure that you can see the polygon clearly (Figure 2b). - Insert the two attached hexagonal screwdrivers into the adjustment screw holes. Turn the centering screw of the condenser to move it to the center of the field of view (Figure 2c).
- Open the field iris diaphragm lever until the image is just outside the field of view.
Using the CM20 system, we tested whether it is possible to observe the culture process of liver organoids that differentiate and grow in Matrigel in a three-dimensional manner.*1
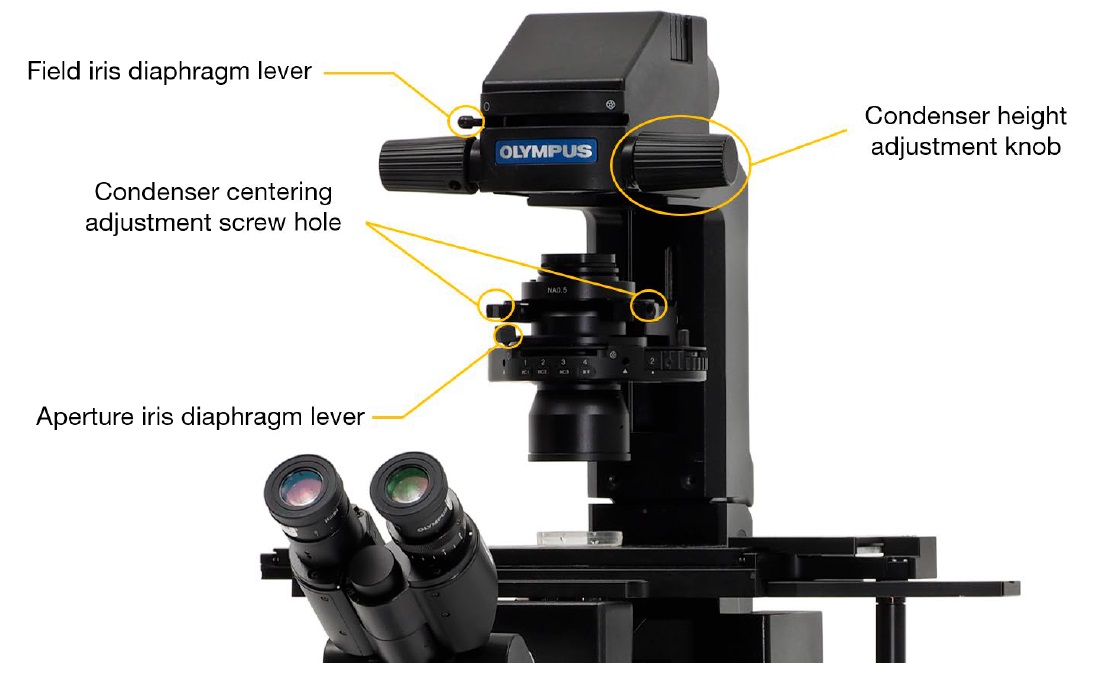
Figure 1: IX73 microscope with an IX2-MLWCD manual condenser
Figure 2a |
Figure 2b |
Figure 2c |

2. Interpupillary Distance Adjustment
The interpupillary distance adjustment modifies the width between the eyepieces to the width of the observer’s eyes for clear observation. Properly adjusting the interpupillary distance enables you to see one clear image through the eyepieces. If you look through the eyepieces and see two images, then the interpupillary distance must be adjusted.
To adjust the interpupillary distance on an IX73 or IX83 inverted microscope or an SZX10 or SZX16 stereomicroscope, follow these steps:
- Look into the eyepiece at the correct eye point position (Figure 3) while focusing your eyes on the specimen. To observe comfortably, your eyes need to be a certain distance away from the eyepiece. When wearing glasses, make sure that they touch the glass of the eyepieces. For the naked eye, rest your eyes on the rubber eyecups attached to the eyepieces.
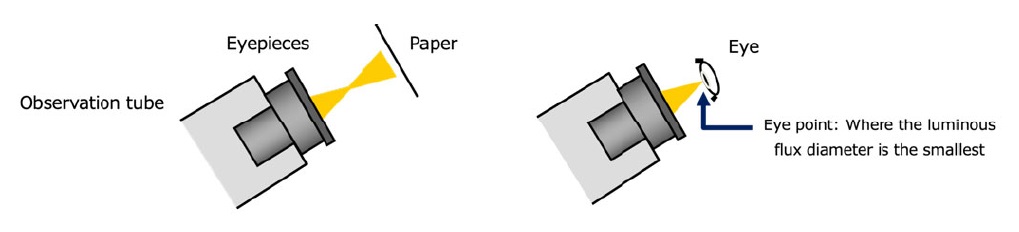
Figure 3 - Widen or narrow the eye widths of the left and right eyepiece horizontally so that the left and right field of view appear as a single image in the middle. Bring your eyes closer to the eyepiece while staring at that single image. Repeat this adjustment so that the right eye, left eye, and both eyes can see the same field of view.
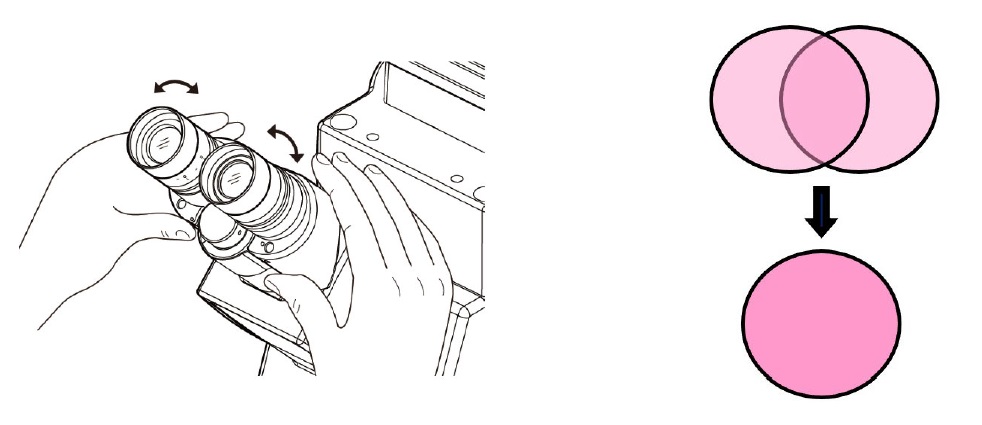
Figure 4
3. Diopter Adjustment
The diopter adjustment corrects the difference between the left and right field of view and minimizes the focus shift due to switching the objective lens. As the diopter varies between individuals, the diopter adjustment is required for each user.
To adjust the diopter on the IX73 or IX83 inverted microscope, follow these steps:
- Set the scale of the diopter adjustment ring on both sides to the “0” position.
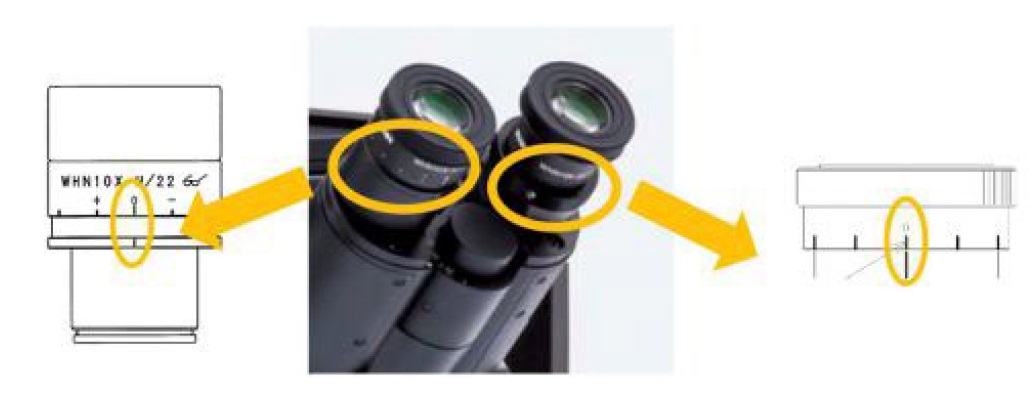
Figure 5 - Insert a low-magnification objective lens (e.g., 10X) into the optical path. Look into the right eyepiece with your right eye and focus on the specimen with the coarse movement handle.
- Insert a low-magnification objective lens (e.g., 10X) into the optical path again. While looking at the specimen with your right eye, rotate only the diopter adjustment ring on the right side (observation tube side: the jagged part in Figure 6a) to focus on the specimen.
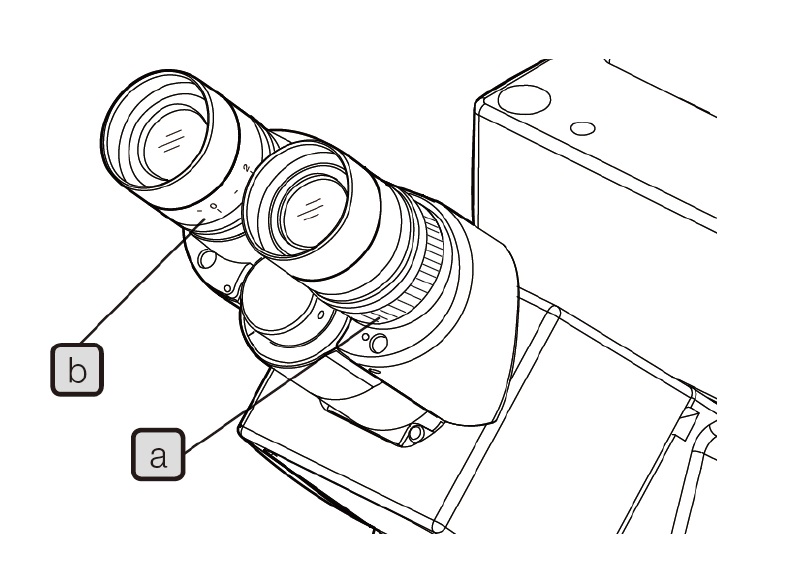
Figure 6 - Look into the left eyepiece with your left eye and rotate only the diopter adjustment ring (Figure 6b) on the left side (the eyepiece side) to focus on the specimen.
4. Correction Collar Adjustment on an Objective Lens
Due to the influence of the bottom surface of a specimen container, spherical aberration (an optical error where light does not collect at one point on the optical axis) may occur in the observed image. This can cause the image to become unclear. The role of the correction collar on an objective lens is to reduce this aberration.
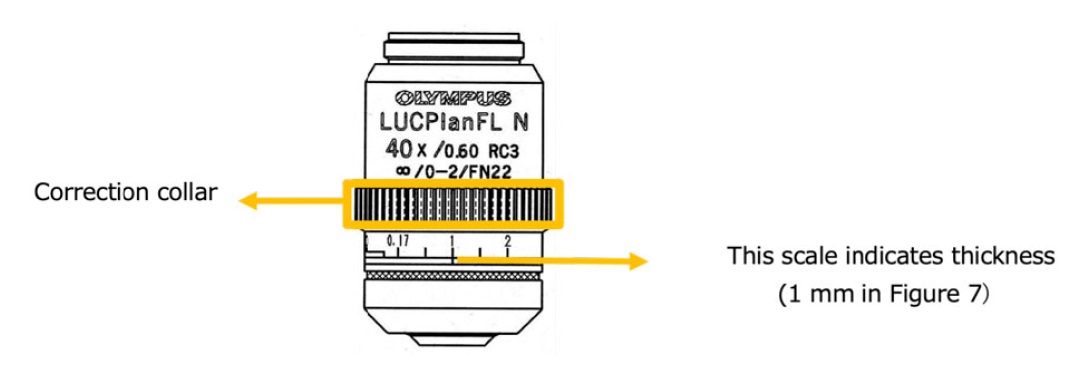
Figure 7
Olympus objectives are optically designed for a container thickness of 1.5 mm, which is the typical thickness of a coverslip. This means that when the objective’s correction collar is set to a position of 1.5, the total bottom thickness of your heat plate and container must be 1.5 mm. This total thickness enables you to get the most out of your objective.
To meet these specific thickness requirements, carefully choose a heat plate that works with your specimen container. For a plastic dish with a thickness of 1 mm, choose a heat plate with a thickness of 0.5 mm. For a glass-bottom dish with a thickness of 0.17 mm, choose a heat plate with a thickness of 1.3 mm.
You can also set the correction collar of the objective lens according to the combined heat plate thickness and the container thickness (when using the IX73 inverted microscope). Here are two examples:
Example 1: When the heat plate is 0.5 mm thick and the glass-bottom dish is 0.17 mm thick, combine the thicknesses (0.5 + 0.17 mm = 0.67 mm) and adjust the correction collar to the position of 0.67 mm (Figure 8).
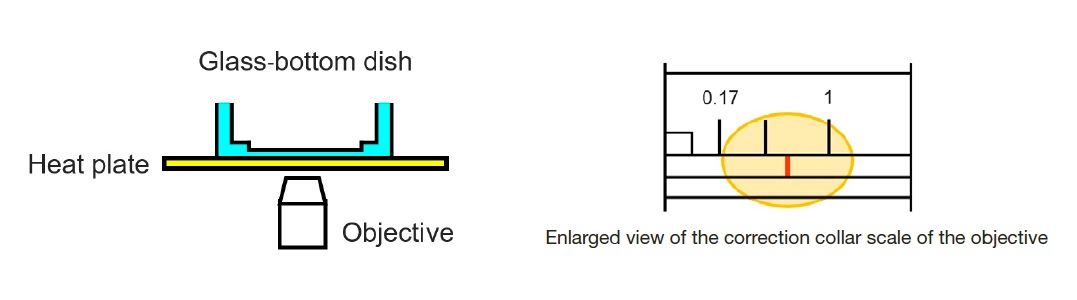
Figure 8
Example 2: When the heat plate is 0.5 mm thick, and the plastic dish is 1 mm thick, combine the thicknesses (0.5 + 1 mm = 1.5 mm) and adjust the correction collar to the position of 1.5 mm (Figure 9).
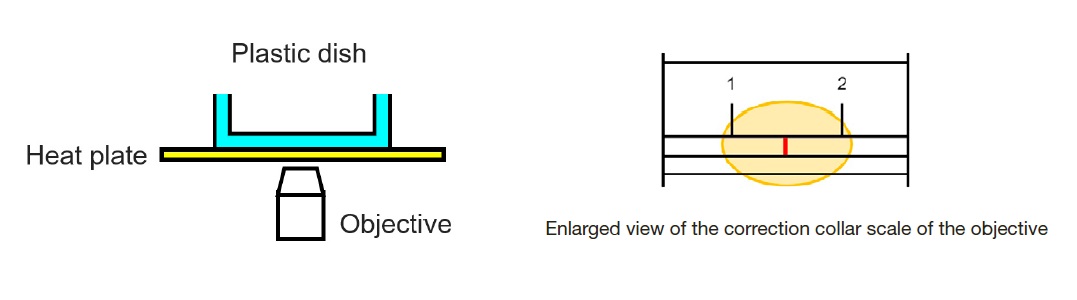
Figure 9
5. Zoom Parfocal Adjustment
The zoom parfocal adjustment prevents out-of-focus issues when switching between low and high magnification. If this adjustment is done properly, you won’t need to adjust the focus each time you switch the magnification during work such as oocyte cleaning. This can improve work efficiency.
To adjust the zoom focus on an SZX10 or SZX16 stereo microscope, follow these steps:
- Set the zoom handle to the minimum magnification side and focus with the coarse movement handle.
- Gradually move the zoom handle to the high-magnification side and focus with the fine movemen thandle, then raise it to the maximum magnification and focus.
- Return the zoom handle to the low-magnification side. If the view is out of focus, rotate the diopter adjustment ring of the left and right eyepieces to focus.
- Again, set the zoom handle to the maximum magnification side and check if the view is in focus. If it is out of focus, repeat steps two and three. Zoom focus adjustment is complete when both the minimum and maximum magnifications are in focus.
- Adjust the eye width so that both eyes can see a single field of view.
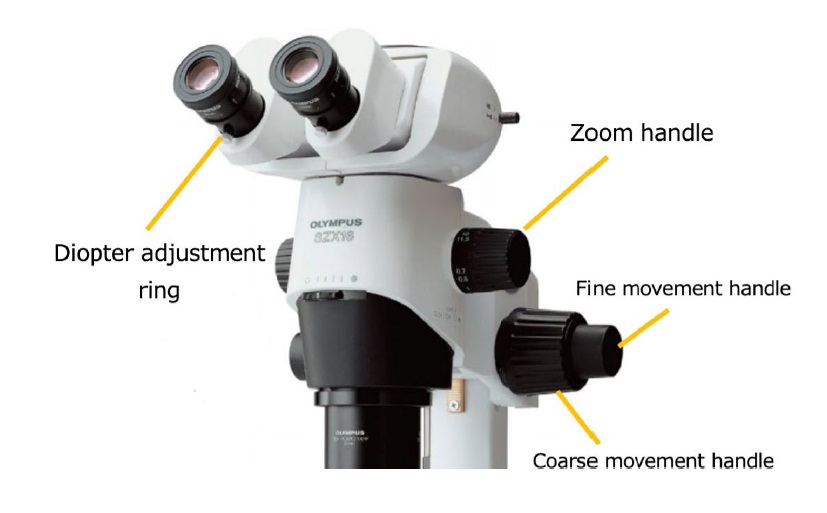
Figure 10
Marie Kawasaki
|

Products Related to This Application
Sorry, this page is not
available in your country.